Add comments to your blog with Isso

Table of Contents
If you’re not using a CMS like WordPress, chances are your CMS or blog engine doesn’t support comments.
That makes sense if it’s a static blog built with a tool like Hugo, Jekyll or Zola, but does less when your blog is powered by a database, like Ghost is.
I think comments are part of a blog and it’s important to enable them. Readers can thank you for your work, report a mistake, discuss the article, etc.
Most of the time, you’ll see blogs embedding Disqus threads (even on WordPres)… And it’s bad.
Basically, you have all the disadvantages of centralized proprietary free service:
- You don’t own you comment: Disqus is gone, your comments are gone
- Third party assets on your websites
- Fat JS stuff to load the threads
- Privacy issues: tracking and ads
That being said, it’s convenient. And there are very few alternatives.
But let’s fix that: let’s use Isso.
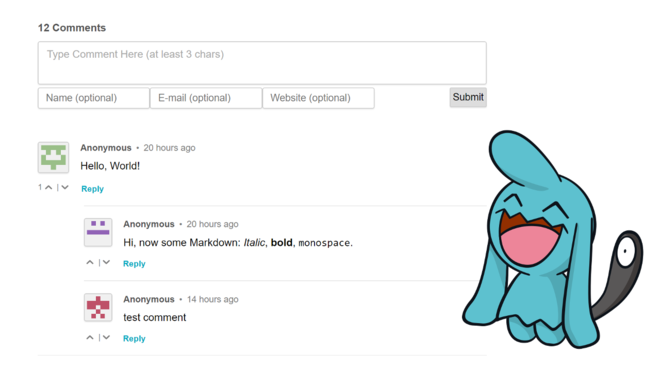
Isso is an Open Source commenting system written in Python, using a SQLite database. You embed it the same way as Disqus on your website, but this time it’s a 18KB self-hosted JS file that doesn’t track you… Nice, isn’t it? It does not even require an email nor username, and doesn’t embed external services like Gravatar.
Update: It has an admin panel as of v0.11.0!
Installation #
The documentation does a great job covering the installation process.
Below is what you have to do to run Isso on Debian/Ubuntu.
Dependencies #
apt-get install python-dev python-pip sqlite3 build-essential
Add a user #
adduser isso --disabled-login --disabled-password
Install Isso #
Install isso as the isso user.
su - isso
pip install isso
Configuration #
Please read the documentation to know all available options.
As en exemple, here is the configuration I’m using for this blog (/etc/isso.conf):
[general]
dbpath = /var/lib/isso/comments.db
host = https://stanislas.blog/
max-age = 15m
notify = smtp
log-file = /var/log/isso.log

[moderation]
enabled = false

[server]
listen = http://localhost:8080
reload = off
profile = off

[guard]
enabled = true
ratelimit = 2
direct-reply = 3
reply-to-self = false
require-author = false
require-email = false

[smtp]
username =
password =
host = localhost
port = 25
security = none
to = <my email adress>
from = <isso at my fqdn>
timeout = 10
host equals to the websites where you want to embed Isso.
Systemd service #
Isso will be used as a daemon listening on port 8080. We can create a systemd service (among other init systems) to manage it easily and autostart it.
Add the service in /etc/systemd/system/isso.service:
[Unit]
Description=lightweight Disqus alternative

[Service]
User=isso
Environment="ISSO_SETTINGS=/etc/isso.conf"
ExecStart=/usr/local/bin/isso -c $ISSO_SETTINGS run

[Install]
WantedBy=multi-user.target
It’s very simple and straightforward.
systemctl enable isso
systemctl start isso
Nginx reverse proxy #
We’ll use a reverse proxy to setup Isso under a subdomain with HTTPS.
Install Nginx:
apt install nginx
Here is a example vhost (/etc/nginx/conf.d/isso.conf):
server {
        listen 80;
        listen [::]:80;
        server_name isso.angristan.xyz;
        return 301 https://isso.angristan.xyz$request_uri;

        access_log /dev/null;
        error_log /dev/null;
}
server {
        listen 443 ssl http2;
        listen [::]:443 ssl http2;
        server_name isso.angristan.xyz;

        access_log /var/log/nginx/isso-access.log;
        error_log /var/log/nginx/isso-error.log;

        ssl_certificate /etc/nginx/https/fullchain.pem;
        ssl_certificate_key /etc/nginx/https/key.pem;

        location / {
                proxy_set_header Host $http_host;
                proxy_set_header X-Real-IP $remote_addr;
                proxy_set_header X-Forwarded-For $proxy_add_x_forwarded_for;
                proxy_set_header X-Forwarded-Proto $scheme;
                proxy_pass http://localhost:8080;
        }
}
You can use acme.sh to get a Let’s Encrypt certificate.
Using Isso on your website #
Just embed the Isso JS file. For instance, put this under your article:
<script data-isso="https://isso.angristan.xyz/" src="https://isso.angristan.xyz/js/embed.min.js"></script>
<section id="isso-thread"></section>
I’m using my own Ghost theme, so you can see how I embedded the code at the end of my <article></article> block.
Enjoy #
Well done! You own your comments again. Isso is super simple to install, and super lightweight. It integrates well with any websites, especially static and minimalist ones, so why not give it try?